|
| J.B.'s Line boring and machining oper... |
| Author |
Message |
    
richarddurgee
Senior Member
Username: richarddurgee
Post Number: 1122
Registered: 11-2001

| | Posted on Thursday, May 25, 2006 - 01:29 am: | 


|
J.B.'s Machining photos
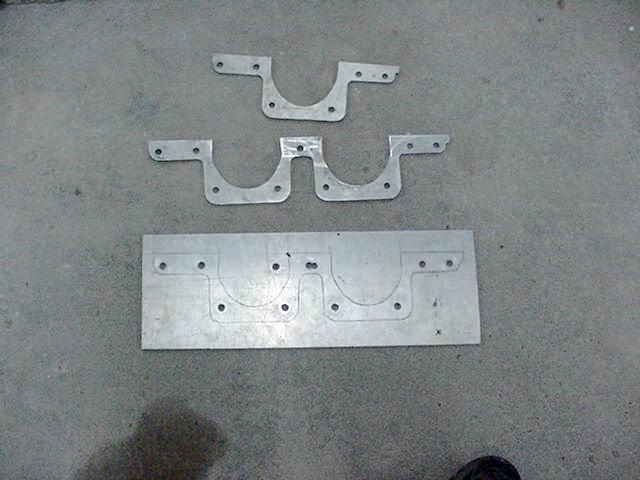
#1 gasket template for 4 and 8hp L-A. Can cut many thin and thick gaskets at one time.
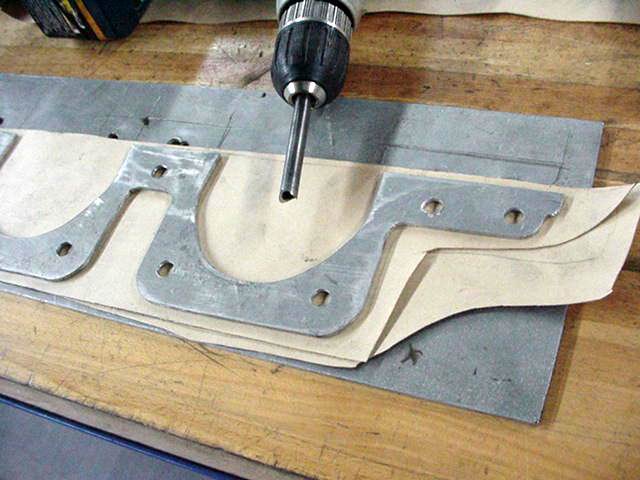
#2 push rod sharpened To "fish mouth" , cuts holes without tearing gasket.
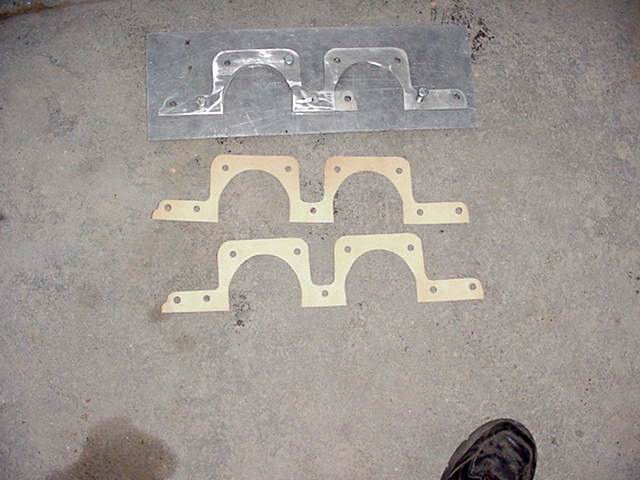
#3 finished gaskets
#4 boring jig, four 3/4" bolts cut 1/4" short of base, drilled and tapped for 3/8" bolts, welded to plates bolted to tool carrige. Oversize holes in plates and 3/8" bolts in 1/2" base holes all allow for latterel movment. Vertical alignment is done with the 3/4" nuts, the 3/8" bolts lock the base down.
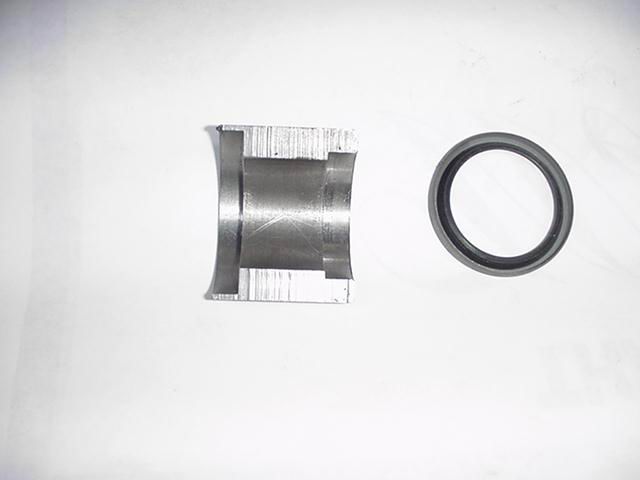
#5 Gauge for setting tool depth and seal. My lathe has a short bed, tool had to be moved for each bearing. I bored a piece of stock to fit the boring shaft, counter bored one side 1 3/8" for the bearing, other side 1 3/4" for the seal. The tool was split in half so it could be held over the shaft , the cutting tool is spring loaded, pops up to the tool.
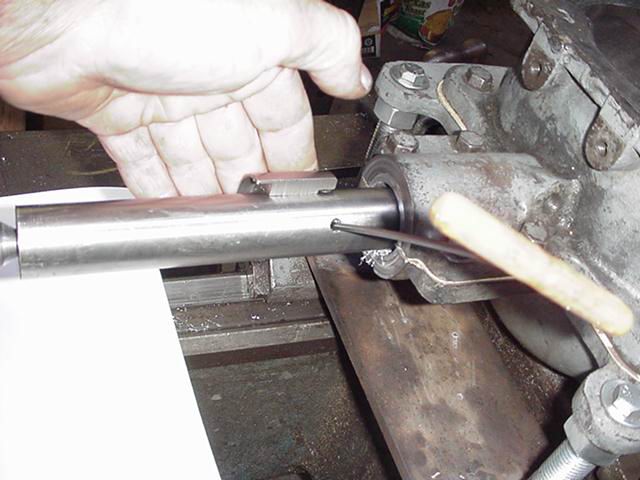
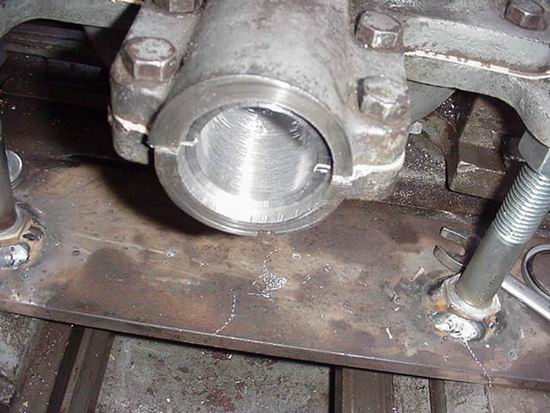
#6 Tool in place, setting cutter, it's concentric to the shaft so you don't have to feel for a high spot.
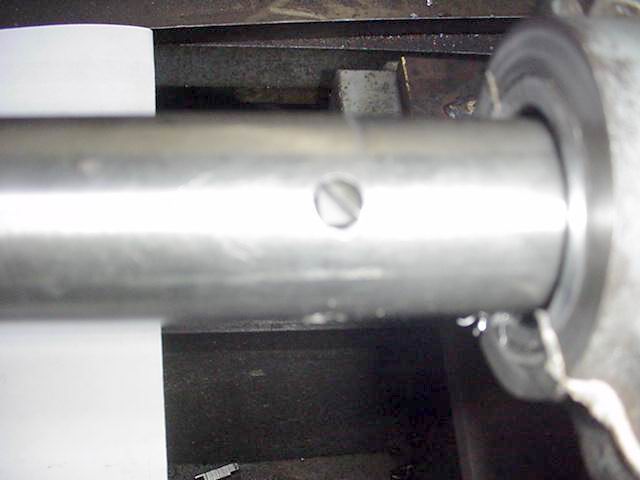
#7 Cutting tool. I first tried sharpening the tool like a lathe cutting bit. Babbit kept piling up on the tool. I then sharpened the tool at a 45 degree angle, it pulls the fillings out of the way, you can see the strings in the base.
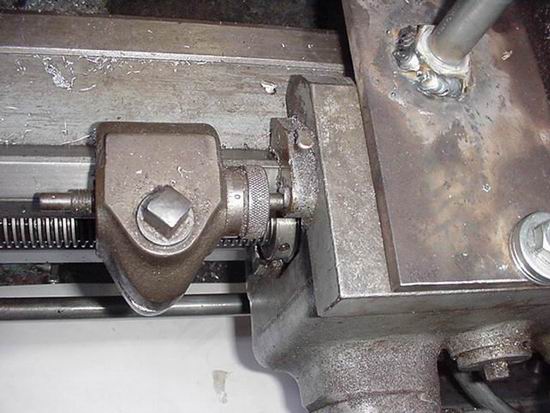
#8 I brought my stop against the tool carrige, left loose to slide. As I bored in, I would stop and back out to clear the cuttings, return to just shy of the stop, engage carriage and resume cutting. In a blind hole you have no way of seeing where you stopped.
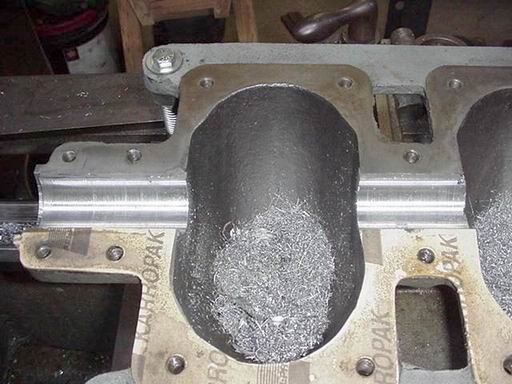
#9 Counter bore for the seal and finshed bearings
#10 Finished bore
 |
jb_castagnos
Senior Member
Username: jb_castagnos
Post Number: 128
Registered: 07-2002
| | Posted on Thursday, May 25, 2006 - 07:05 am: |
|
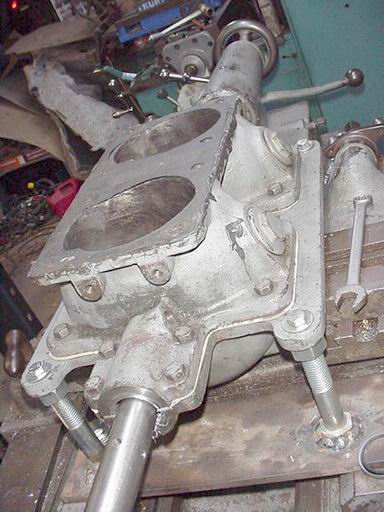
Thanks for taking the time to post them Richard. This case is for a Nadler 8hp, same as a Lockwood- Ash. This is a popular engine in our area, that's why I have the templates and jigs. The bearings in this case were poured too thick and out of plane, against a worn crank. Since there was enough material I line bored them to the standard bore. Bob Legnon had a crank that he had built up and reground. This motor will be run in a boat, the seals keep it much cleaner. Bob does this on all his motors. |
miro
Senior Member
Username: miro
Post Number: 230
Registered: 11-2001

| | Posted on Friday, May 26, 2006 - 12:23 pm: |
|
JB - this has convinced me that I MUST visit with you folks next year . . . .miro
ps I have not forgotten about Dick G's propeller question |
jb_castagnos
Senior Member
Username: jb_castagnos
Post Number: 130
Registered: 07-2002
| | Posted on Friday, May 26, 2006 - 01:32 pm: |
|
Miro, will be looking forward to your vist, maybe we can plan some technical stuff. I brought my old digital camera to the shop, I'll take some pictures of other operations, have to pour some rod bearings soon. Richard said he'd be glad to post them. |
paulgray
Member
Username: paulgray
Post Number: 25
Registered: 05-2003
| | Posted on Friday, May 26, 2006 - 06:20 pm: |
|
JB- Nice work on the bearings- Reminds me of using an old KW boring setup on a couple of model T blocks. I ended up taking several light cuts. The cutter has a screw feed to move it out radially. Since the shaft was 1.000" I would insert gauge pins between the shaft and the bearing shell to measure the overall diameter after each pass and sneak up on the final dimension.. Then I would hike out the cutter a bit each time until I got it right size. Your gasket hole cutters are a nice design- will file that away for future use. Thanks for sharing the pix.
Paul } |
rbprice
Senior Member
Username: rbprice
Post Number: 196
Registered: 11-2001

| | Posted on Saturday, May 27, 2006 - 11:59 am: |
|
JB - Miro and I are going to rent a Lear Jet and come down together in March.
Bob |
|
|
|


|