|
| P55 (reverse gearbox) stuck in neutra... |
| Author |
Message |
    
Hans Poutsma
Member
Username: hansp77
Post Number: 30
Registered: 04-2006
| | Posted on Thursday, February 07, 2008 - 04:26 am: | 


|
thought I would start a new thread for this as it is a distinct seperate issue,
I started posting about this yesterday in this thread
http://www.oldmarineengine.com/discus/messages/3436/105255.html
here was the problem
Continued Gearbox trouble.
As of yesterday I cannot shift out of neutral into either forward or reverse. Over going away for christmas holidays omething has locked up.
I can spin the prop-shaft freely with my hand so the whole thing has not seized, I just cannot get it into gear.
One suspicion (and hope) is that water may have leaked down the control collum and it may 'simply' be that top unit that has seized?
This top unit seems a lot easier to get off and work on...
but my fear is, that this feels pretty similar to how it felt when I was cleaning the gear box out with Kero and it wouldn't shift into gear... that problem got solved then at the end of the cleaning process by the final addition of new oil.
if it is an actual internal gear/cone problem and there is no way to fix it without dismantling then this will be very dismaying.
I have very little working space to remove only the gear box (and even if I could get it off, getting it back on may prove impossible), and thus would probably have to consider removing the whole engine to work on it...
meaning while its out I should probably consider doing a rebuild...
meaning I have to ask myself if this engine is worth it... a question I don't want to have to ask...
bugger.
any advice at all would be greatly appreciated.
If this old thread doesn't get any hits I will start a new one.
Even suggestions of any mechanic or likewise skilled individual in the Melbourne area that I could pay to check this out and hand me the verdict.
on the bitter/sweet positive side, the engine is running just great now!
EDIT- by the way, I have tried loosening off the adjustment bolt, to either side and still cannot shift.
I am considering draining and refilling the gear box again- any considerations on something to flush it out and dissolve/free the corrosion?
I am considering trying to remove the control collumn- any reason why this is a bad Idea?
cnt'd
after reading through a lot of other advise regarding stuck gear boxes,
Do I try to give the shaft/coupling a good belt?
or is this only when it is stuck IN gear?
Should I be focussing my attempts first on the control collum, or the shaft?
Plus, regarding this, with the shaft moving forward and backward into gears, which way does it move into the forward and revers gear (forward-towards engine, back-towards prop)?
Thanks again,
Hans.
they were my last two posts about the problem, and what follows is what I did and discovered as the problem |
    
Hans Poutsma
Advanced Member
Username: hansp77
Post Number: 31
Registered: 04-2006
| | Posted on Thursday, February 07, 2008 - 05:09 am: | 


|
So, today I went out again on my own, battling a gale and large swell to paddle out and tinker and swear at the engine again...
I sprayed WD40 into every crack and hole possible over the gear box and down the control column,
applied force and a couple of knocks trying to shift the gear,
I overfilled the box with oil and ran the engine for while (after an unusually very very trying cranking start nightmare- battery was still dead- brought it home for a re-charge today)
I tried giving the coupling a heap of whacks with a wooden block and hammer...
no joy whatsoever- still totally stuck in neutral-
so I then went on to remove the control column-
disconnected the throttle and everything else,
and then went on to remove the four bolts that secure the control column to the gear box-
oddly and a side point when removing the four bolts I discovered that they were actually three nuts and one bolt! (maybe they were worried about us putting the column on the wrong way- or maybe this is an oddity of my engine and some old repair?)
once I got it off, I discovered to my 'relief' that indeed it was the control that was locked.
I tested that the prop shaft was moving by tapping it forward and backward and it was- so my problem was issoloated.
Having no real set up to work on the control column on the boat, I packed the control column in my bag with my dead oversize battery and set out for the 600ish meter row back against the swell and the gale to whinch up the tender under the jetty.
Buggered my back lifting the bag from under the jetty up the dicy ladder... and off to my uncles nearby to work on it.
after a good external clean and WD40 with a plastic hammer we knocked the internal shaft forward and backward a dozen or so times until it began to move. Removed the pin from the bottom and then pulled the whole shaft out of the column.
The whole shaft and column was caked with greasy rusty gritty gunk, so I scraped, scrubbed, brushed, oven cleaned, carby cleaned, then hot soapy watered it all,
dryed it, and carby cleaned it again (so the solvents would evap all the remaining moisture)
then greased up the whole thing with marine grease and put it back together...
BEEUUTIFULL!
works like a dream.
We found a lovely little brass finger screw that fitted perfectly what appears to be a threaded grease nipple (or oil) hole on top of the column (where it was my suspicion that water may have leaked in).
and then I came home.
I will go back on saturday to fit it back on.
now the questions and some other issues.
when I took off the column I noticed that the oil level in there was quite low compared to where I thought the gear box level was (there is also a bit of rusty gunk around the top)
I tried filling it with oil, a couple of times, before I noticed that it was just leaking out the back around the prop shaft (before the coupling).
Is this meant to be filled with oil or grease?
Is this an isolated region or does it share the same oil as the gear box?
If it does share the same oil as the gear box, then does the leaking out the back of the prop shaft mean I have a seal to replace, or is the leaking simply because I overfilled it?
finally, and a separate issue,
In my painfull cranking start today, I noticed that my spark plugs are not sealing properly.. I had a tiny bit of WD40 pooled around the plugs and noticed sequential bubbling with the cranking of the engine.
I took out the plugs and gave the top of the block a good clean and a light sand, but it is rather pitted.
I do not wish to apply any more torque to the plugs that I already am (quite a bit) so I considered either trying to sand/grind the top smooth (not ideal as I don't want gunk to get in the engine)
or, what I leaning towards, cutting some soft metal gaskets (lead?) to fit between the plugs and block that would conform to the pitted metal surface and seal it properly.
ANY thoughts on this would be welcome,
Hopefully once this leaking of compresion is solved then it will also improve my starting problems.
anyway, thats it for the moment,
dinner time then a bath to try to help my back-
progress, slow but good,
any comments welcome.
Hans. |
    
Peter Ogborne
Senior Member
Username: peterogborne
Post Number: 246
Registered: 09-2002

| | Posted on Thursday, February 07, 2008 - 06:18 am: | 


|
Well done Hans, you don't need help at all !!!
A couple of things, the leaking around the spark plug ,happens a lot ,try some new copper washers .Use the commpressible ones.A little gas leak wont hurt much .You could take the head off and get plug hole ''spot faced''. A machine shop will able to do it ,its a simple and cheap job.
Sounds like the gear box oil seal is leaking .You will see that the coupling boss slides in and out of the seal as you engage forward and astern . Sounds like working space is your major problem .
I dont think overfilling with oil would result in the sort of leak you describe....it would be the seal.
The gear box lever column...It shares the same oil as the gear box but there is lubrication point for an oil can.
Glad you solved the stuck changing lever ....water in the box over a period can do lots of damage .
You sound like you have it all under control. |
    
Hans Poutsma
Advanced Member
Username: hansp77
Post Number: 32
Registered: 04-2006
| | Posted on Friday, February 08, 2008 - 02:19 am: | 


|
Thanks alot Peter,
'all under control'? well, that might be an overstatement, but with much help I am slowly learning.
You are right, working space IS my major problem (along with working on the water out on a swing mooring).
One day when work has finished on the boat itself (yeah right) I would like to pull the hole engine and restore it- in the mean time I have to leave it in situ
I have access to the front of the engine, sort of to the sides, and apart from reaching from the front around to the back, have no access at all to the rear- I certainly cannot see what I am doing when I can reach it.
Which leads me to a question,
regarding the gear box oil seal (which I really cannot get a good look at)
what is it (is this a an order from Fairways?)
and can I replace it without removing the gear box?
looking at this photo I can see what appear to be 6? bolts holding on a sort of plate where the 'coupling boss' slides into the lower lever column end of the box
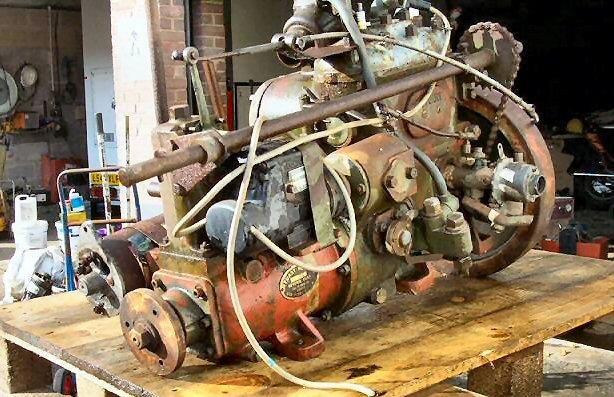
(regarding terminology, by 'coupling boss' is this what appears to be the 'coupling shaft' and or the 'gear operating sleeve'?)
here is the image from the manual that shows the bits I am thinking of
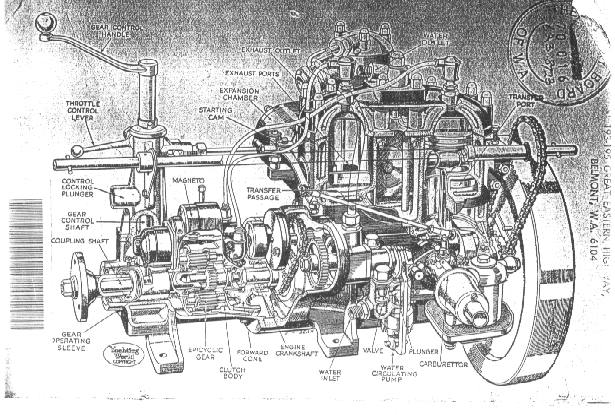
If I undid these bolts, undid the coupling and reversed the prop shaft out as far as it would go (bear in mind I would be doing this on the water), and removed that plate, is it possible to pull out the boss (or the way I am thinking of it, the coupling shaft and the gear operating sleeve) and get at replacing the seal that way?
Or can that plate be slid over the boss once the coupling is removed- and the seal replaced?
or is the whole boss, the shifting components and or the gears too intermeshed to remove it and replace the seal this way?
what I would like to address is that I could see a gunky rust level above the line from where the oil leaks out the shaft down to. Below it, it looks fine, above, not.
If it is just too hard to do in the present situation, then I will just have to keep an eye on the gear box oil, making sure it doesn't get water in it again (which I am quite sure has been in it the entire time of my two year ownership and more), and hope for the best until I get an opportunity to pull the entire engine (no doubt years down the track).
Thanks,
Hans.
btw,
I have just got a couple of sets of hotter plugs to try out-
I have been using NGK B5HS
and will try out NGK B6HS and B7HS. |
    
David Myers
Advanced Member
Username: dave_myers
Post Number: 33
Registered: 11-2006

| | Posted on Friday, February 08, 2008 - 03:52 am: | 


|
Hello Hans,
Undo the set screw holding the prop shaft coupling and slide the whole lot back off the gearbox shaft.
The seal is right in the outer end of the gearbox. The Photo you have supplied is of a P55ME and is a totally different box, the standard box does not have that plate. (The drawing above shows there is no plate). Prise out the seal with a long screwdriver and slide off the end of the shaft. Slide the new seal on and tap it into the housing.
Clean the coupling boss and smear some oil on the seal face and slide it back onto the shaft and lock in place and thats it.
Seals are readily available from Bearing suppliers... BSC, Bearing Traders etc. Just take the old one in and they will match it up.
If you do have the gearbox with the plate on the end then life will be a little easier. Drain the gearbox, do as above with the coupling and remove the plate. It has the seal and POSSIBLY! the bearing. (I will have to check that for you as I have a 55ME geabox in the shed).
Hope that helps a little more for you Hans. I will check the box I have and get back to you.
Cheers,
Dave |
    
Hans Poutsma
Advanced Member
Username: hansp77
Post Number: 35
Registered: 04-2006
| | Posted on Friday, February 08, 2008 - 05:03 am: | 


|
Thanks again Dave,
that actually sounds quite doable!
Not being able to actually see the area in question very well, I wasn't sure if it had the plate or not, but now that you mention it, from feeling around there and from what I can see I am pretty sure that you are right and what my engine has is the same as the diagram.
I will see how it goes tomorrow and update the thread,
Many thanks,
Hans. |
    
John Archibald
Advanced Member
Username: john_archibald
Post Number: 40
Registered: 08-2006

| | Posted on Friday, February 08, 2008 - 09:43 pm: | 


|
I was just thinking that maybe the "subtitle" of this thread should be changed to "perverse gearbox".
Archibald
. |
    
Hans Poutsma
Advanced Member
Username: hansp77
Post Number: 38
Registered: 04-2006
| | Posted on Saturday, February 09, 2008 - 04:12 am: | 


|
Haha!
good suggestion Archibald,
with all the swearing and screaming I did today, thats actually quite a good idea..
So, I just got back.
What a absolute pain of a job- but its done.
every little step was an exercise in frustration, pain and perseverance.
Got the coupling separated with a mild 8/10 degree of suffering, and then the real work started.
The nut holding the coupling to the coupling shaft was impossible to move- the major problem was trying to get the coupling to hold still so I could get enough torque on the shifter.
I ended up having to fit a bit of timber to the back of the coupling, siting flush to the floor and bolt it to one of the coupling bolt holes, and then try with every ounce of my strength to turn the shifter- success only came finally with all my weight standing on the shifter.
After that it was time to 'pry' out the rear gear box seal.
I must say, if Dave had not described this well to me, I never would have gotten it out- I would have chickened out thinking that what I was attempting to do was simply not meant to happen. It was quite simply bonded to the gear box. After twenty minutes of prying I got the inner perished rubber seal out, then with fingers found a circular spring.
Then the casing- gunked up and nicely painted in.
I could feel what 'felt' like it should come out, but it just didn't want to- the rim would keep bending out, and eventually tore in two places before finally with one mighty curse the bugger popped out- quite mangled and worse for wear but hopefully in good enough shape to take down to the bearing shop and find a replacement.
Then it was time to drain the bilge and all the accumulated gear box oil from my attempts to fill it.
My partner and I got totally greased up filling up buckets and bottles, pumping up the oily muck.- seperating the water from the oil (water over the side- and oil into bottles to take back).
Finally, as I went up for a bit of air on deck, my mobile rang, had to find it, missed the call, redialed it (my uncle seeing how the work was going), and then in a swift motion bringing my phone up to my ear, my hand stopped, and in a oil fueled continuation of the arc, my mobile phone continued and slipped out of my hand, flying back over the transom and plunking into the drink.
I had to laugh, then scream, then laugh...
of course I don't have any of my numbers stored anywhere else, so there is a bit of work and money replacing that one.
Oh well.
GOT THAT BUGGER OF A SEAL OUT!
Heres hoping I can find a replacement.
Thanks for the help Dave,
Hans. |
    
Matthew Balkwell
Member
Username: matt
Post Number: 30
Registered: 04-2006
| | Posted on Monday, February 11, 2008 - 04:21 am: | 


|
Hans, i replaced a oil seal this afternoon with help from Dave as well, the size is 1.5inch inside id and 2.37inch od.
After numerous problems and such there is one thing i have found and that is that when trade houses and suppliers are informed of the ages and origins of our p55s they go that little bit further in helping.
I am going for a run on Sydney Harbour to show the RUBYTOO off to my work mates, they better appreciate what us p55 owners go through.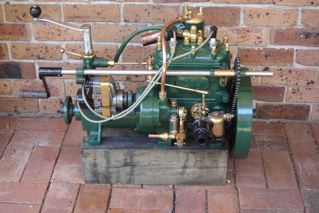 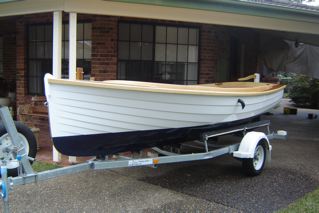 |
    
Hans Poutsma
Advanced Member
Username: hansp77
Post Number: 39
Registered: 04-2006
| | Posted on Monday, February 11, 2008 - 04:39 am: | 


|
Perfect timing Matthew,
I am off tomorrow morning to hunt out that oil seal- those dimensions might just be a lifesaver (as mine got quite mangled on the way out).
Rubytoo is looking absolutely fantastic- and that P55... remind me never to post a picture of mine (until I get a chance to pull it out and polish it up like yours).
Great work,
Thanks a lot,
Hans. |
    
Kent H Smith
Member
Username: kent_smith
Post Number: 9
Registered: 10-2004
| | Posted on Monday, February 11, 2008 - 07:59 am: | 


|
Hi Matthew,
as an R3M owner and Stuart enthusiast, I follow these threads with great interest and file the details away for future use. The Q & A information shared is obviously the main purpose of the site, but it's also great to get some good pics to go with the threads.
Any shots of these great old engines and the beautiful boats they power, like the Rubytoo, help tell the story.
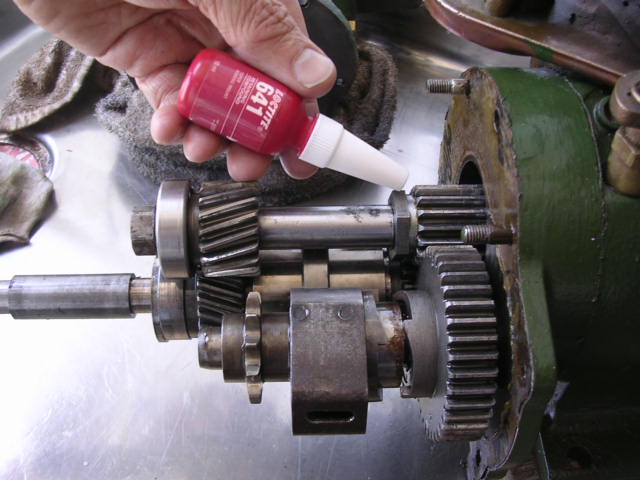
I've been following Hans story with interest and note these repairs are often not plain sailing. I've had my share of these problems on my R3M when repairing a loose nut inside the gearbox.
The offending nut secures the cog that engages when the engine is cranked, allowing the engine to be turned over and started. because it had become loose it allowed the cog to slip out of place along the shaft and not engage when the starting handle was turned, meaning the engine could not be cranked over.
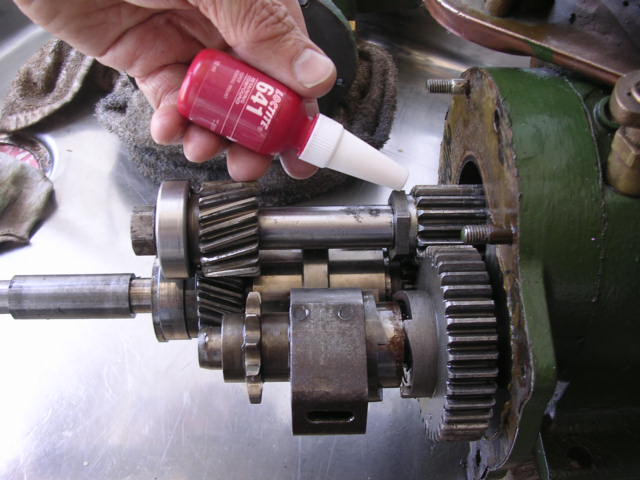
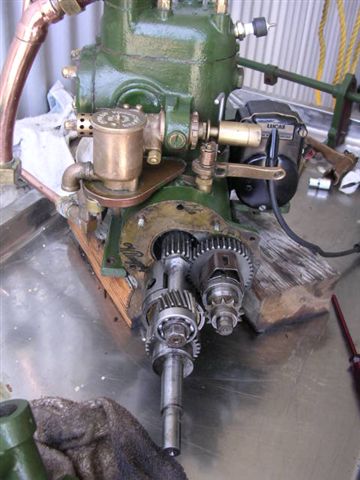
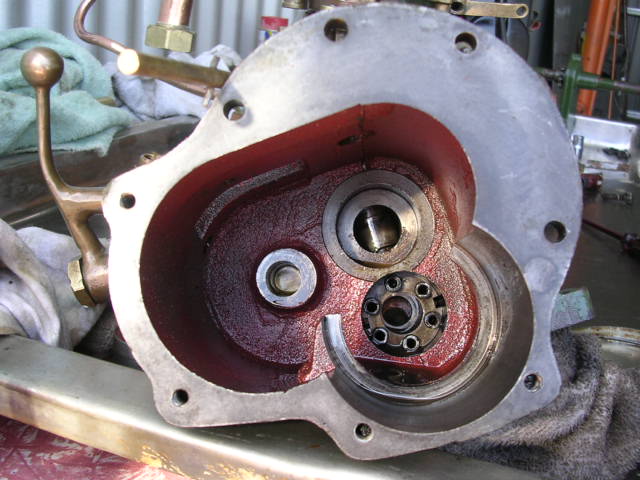
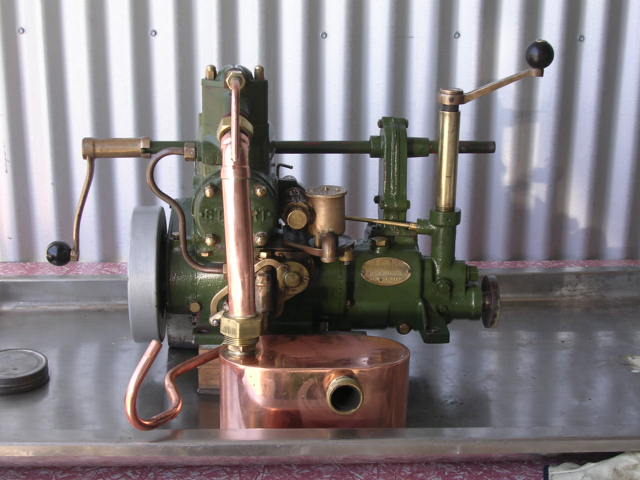
The amount of time and effort, including accidental breakage of an internal cast iron part during the repair, was a steep learning curve. Having bought a fully restored engine from the Uk I thought it would be years before I needed to do any major repairs, but after only a few months I was forced to pull it apart and learn the hard way. On the positive side, I had no problems getting a replacement casting from Fairways. (see pics of offending part and R3M below).
regards Kent
     |
    
Matthew Balkwell
Advanced Member
Username: matt
Post Number: 31
Registered: 04-2006
| | Posted on Tuesday, February 12, 2008 - 03:27 am: | 


|
Kent, great to hear from a Stuart enthusiast from Australia, my dad and i had a great run on the harbour today but we have a niggling knock from either the maggy and pump drive chain, or it is the shaft that drives the water pump which has just a bit too much play for my liking, but for the engine to run faultlessly for four and a half hours today with a fifteen minute coffee and cake break was reassuring.
Your R3M looks great, did the muffler come standard? it is a great piece of workmanship.
If it is raining tomorrow i will pull the pump off and have a look around and see if a spare pump housing unit we have has less play with in the shaft, otherwise we will go for another run, there is nothing better than just being out on the water knowing that with confidence that the Stuart will get you home.
Matt |
    
Kent H Smith
Member
Username: kent_smith
Post Number: 10
Registered: 10-2004
| | Posted on Tuesday, February 12, 2008 - 07:29 am: | 


|
Matthew,
In the early outings I stayed close to base worried that the engine might fail, but these days I always feel confident the Stuart will get me home. It just keeps going and the more hard work it gets the happier it seems to be. Always starts first turn and rarely ever stops. if it does it's usually after not being run for a while and is simply a fouled plug, or its run out of fuel.
I use 50:1 mix with high octane unleaded and Valvoline 'running in' oil. I add a small amount of 2 stroke additive which seems to dramatically reduce the oily black exhaust discharge.
The muffler was made by an engineer from Toronto on Lake Macquarie, (Peter), who has restored his own superb old steam boat. It is beautifully made and works perfectly, never gets too hot and creates just the right amount of back pressure.
Replaced the original old Stuart Turner muffler that came with the engine, which was a more traditional shape muffler and not quite suitable for my boat. (Pics below)
I have a tap on the Stuart Turner brass water intake which I can redirect to internal water pick up (in a bucket of fresh water), to flush fresh water through the motor after a run in the sea.
Be interested to hear the result of the pump experiments on your next outing
Cheers
Kent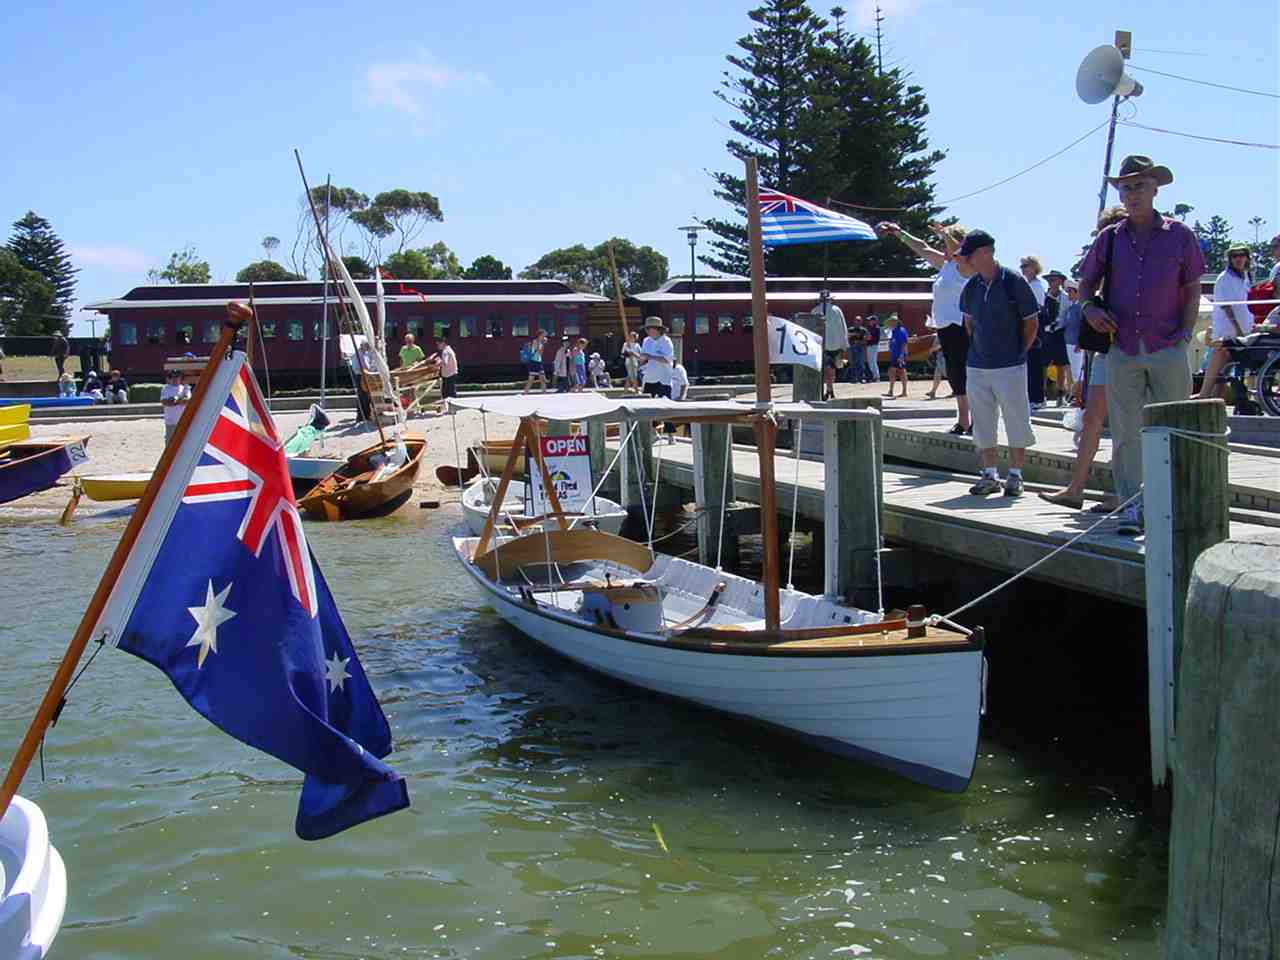 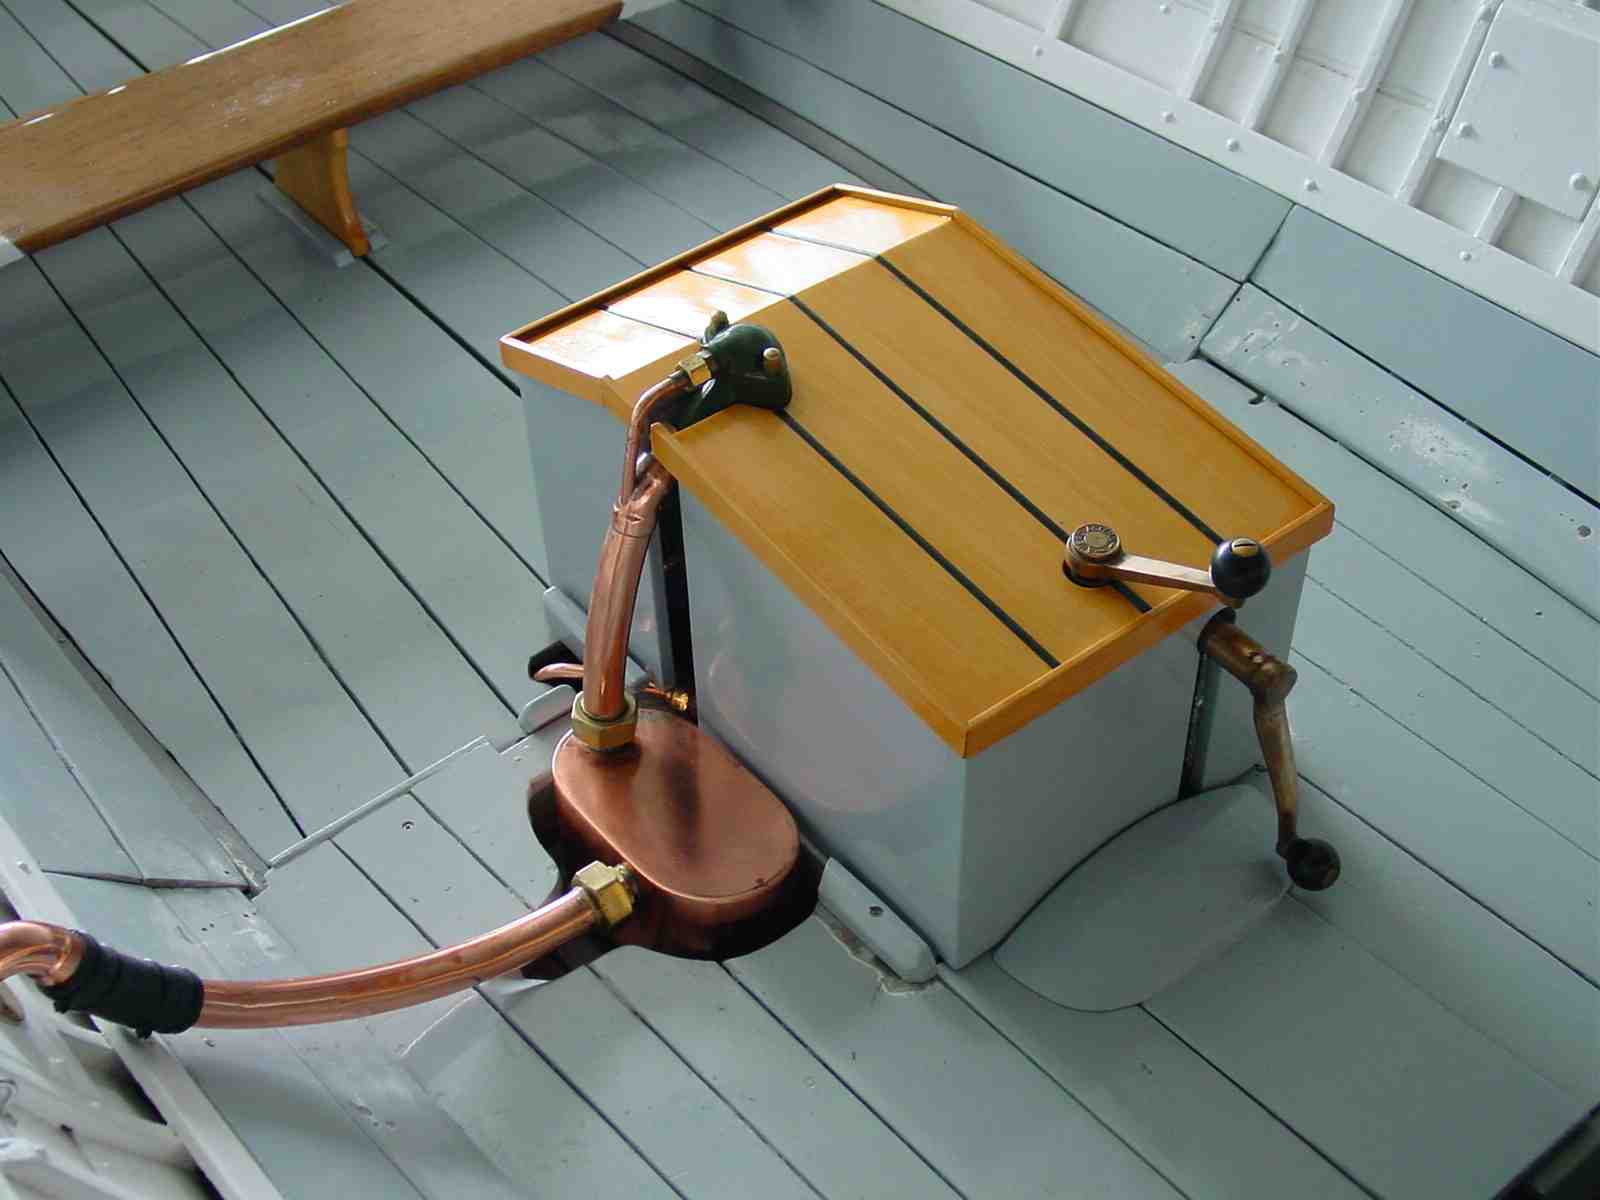 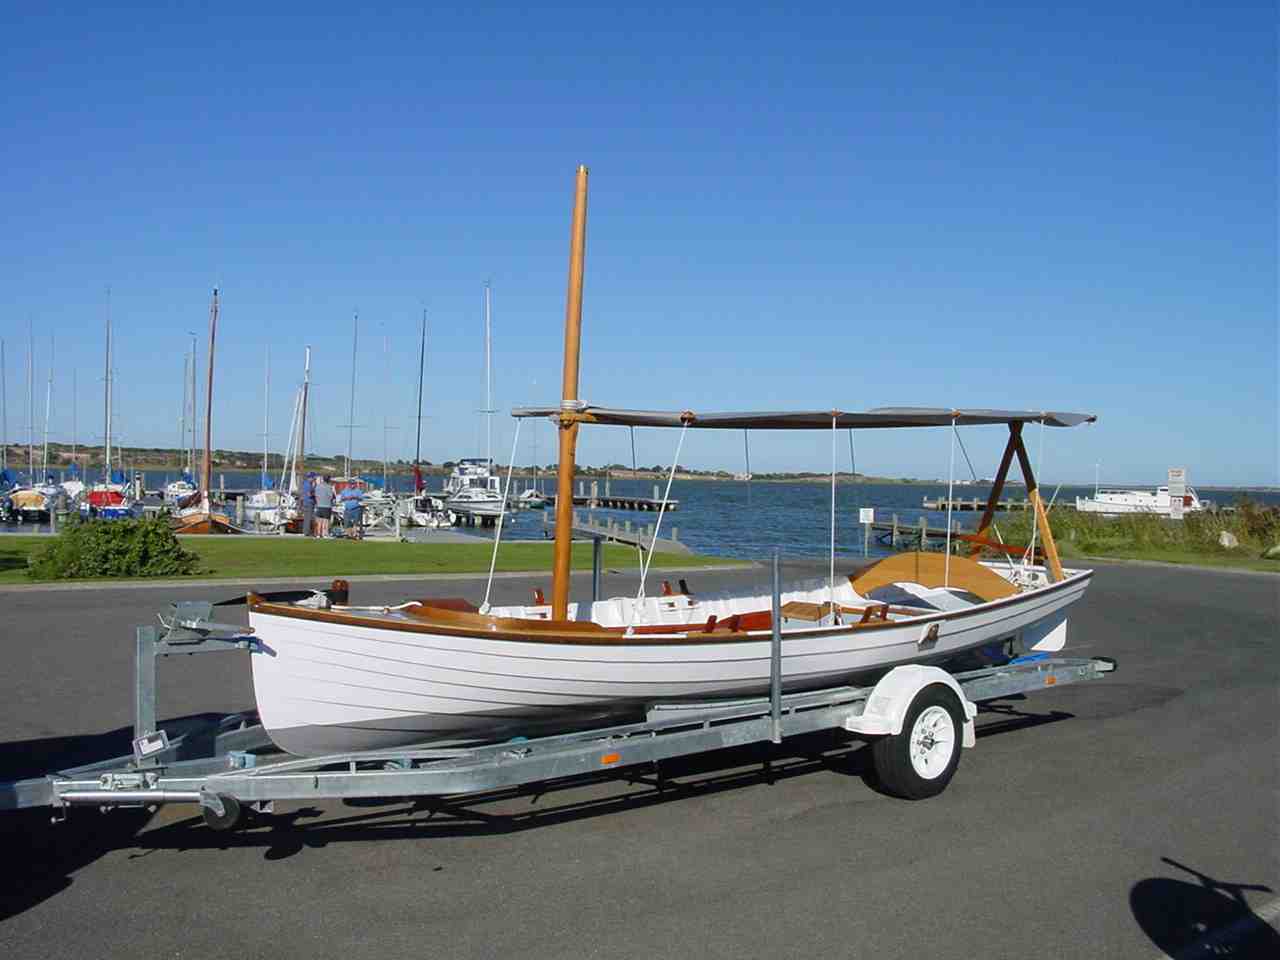 |
    
Hans Poutsma
Advanced Member
Username: hansp77
Post Number: 40
Registered: 04-2006
| | Posted on Wednesday, February 13, 2008 - 01:42 am: | 


|
Lovely engine, boat, and photos Kent,
thanks for posting them.
My update is that I quite easily got the oil seal (the guy at my local bearing shop claimed it was the same as a standard Holden oil seal) and then with only mild difficulty got it in and put everything back together.
The gear shifts easily now.
I drained the crankcase- had a bit of black/blue oily fuel in it-
and then had another bugger of a time getting it started.
 , ,
The fuel is probably getting a bit old now (again) so I am going to drain it on saturday, and try a new two-stroke oil, and as Kent uses some higher octane fuel. I am going to try to be a lot better about only putting in fuel as I use it (from the jerry can) instead of letting it sit there like I seem to do.
So I will be having another day of fiddling with the engine and see if I can figure out what is going on...
My spark seems to be fine, it definately appears to be getting fuel...
we'll see. I am a little exhausted from these engine troubles, so won't go into any more details untill after Saturday (fingers crossed I don't have to).
Thanks Guys,
Hans. |
    
Matthew Balkwell
Advanced Member
Username: matt
Post Number: 32
Registered: 04-2006
| | Posted on Wednesday, February 13, 2008 - 04:16 am: | 


|
Hans, as far as my experiences go the secret seems to be compression and a steady supply of fuel.
Our second engine had undergone a top end rebuild before we bought it and she starts first or second crank and by giving the fly wheel a flick by hand when warm.
When our original engine was out of the Rubytoo we decided to give it a top end rebuild and for less than two hundred dollars in Gaskets and rings it now behaves the same as our second engine.
Unless the engine bounces back from just before top dead centre i am afraid that starting is up to just luck and a cranking fitness program.{as i found out six months later}
A steady fuel supply seems to help as re routing our fuel line to get more help from gravity has also helped.
By the way Kent, your boat looks great ,if you dont mind me asking what are its origins?
Matt. |
|
|
|


|


