| Author |
Message |
    
kayak
Advanced Member
Username: kayak
Post Number: 50
Registered: 06-2016
| | Posted on Wednesday, November 02, 2016 - 11:39 pm: | 


|
should have started one topic so going forward this is it. I have yet another small piece to ask opinions about.
The connecting rod cap is secured by bolts coming up from underneath with castle nuts on washers and a cotter pin in each
but the cotter pin did not go through the castellated slots rather above them. Should I add a second washer to bring the nuts high enough so the cotter pin will go through slots and prevent any turning.
Also, opinions on whether to make a 1/32" fiber gasket for the cylinder base or just use gasket maker? I doubt the valve clearance is that close but wanted to ask.
And it doesn't seem there is any torque spec for things like the rod bolts, anyone care to through a number for good practice or just should I go with "hand tight".
photo is when it was taken apart
thanks!
 |
jb_castagnos
Senior Member
Username: jb_castagnos
Post Number: 1239
Registered: 07-2002

| | Posted on Thursday, November 03, 2016 - 11:15 pm: |
|
I've seen a lot of engines where the pin was higher than the nut, it will prevent complete failure. A washer would bring it up. For torque look online for a torque spec sheet, will give the torque for bolts by size, strength, and thread, I would assume most of these are ungraded, lowest torque specs. |
raa
Senior Member
Username: raa
Post Number: 134
Registered: 02-2007
| | Posted on Thursday, November 03, 2016 - 11:29 pm: |
|
Look for the torque for grade 2 bolts which should be safe. I would vote for the xtra washer or re-drill the hole down so it lines up with the slots. Use a small #2 or #3 center drill to locate the start otherwise the drill may wander off center following the thread. |
johnoxley
Senior Member
Username: johnoxley
Post Number: 168
Registered: 04-2010
| | Posted on Friday, November 04, 2016 - 01:01 am: |
|
Hi - For cyl head and for cyl base should put back same thickness gasket so as to bring piston to head clearance and installed ring height in bore to manufacturer settings. Diesels are especially fussy re cylinder head volume. Piston rings coming up too far will break if they hit ridge (if still there). |
kayak
Senior Member
Username: kayak
Post Number: 51
Registered: 06-2016
| | Posted on Friday, November 04, 2016 - 02:48 am: |
|
thanks, Ok I actually went with the extra washer and a stainless cotter pin, tightening them was pretty self-determined, when lining up the hole, one back wasn't enough, and it would have been too much to the next hole. It's snug, and cant turn.
The piston rings were easy to hand compress and slip into the jug. By then I realized that I did not have the valve springs back on and used an old trick pushing rope into the cyl and bringing the piston up to hold the valves closed while installing the springs.
I need some 1/4" key stock, which they should have at tractor supply. (misplaced the flywheel key)
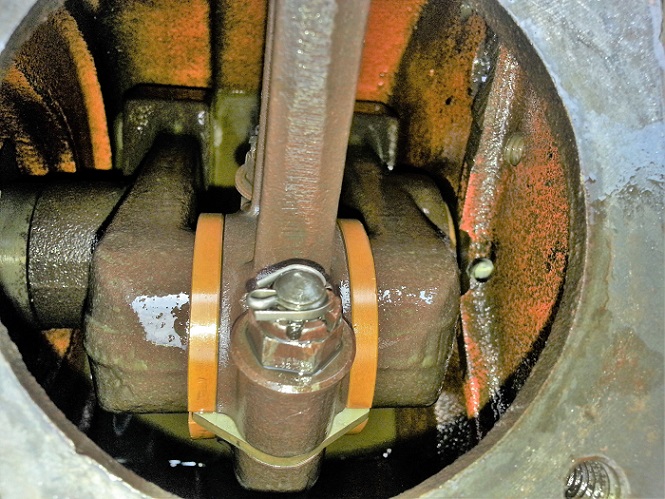
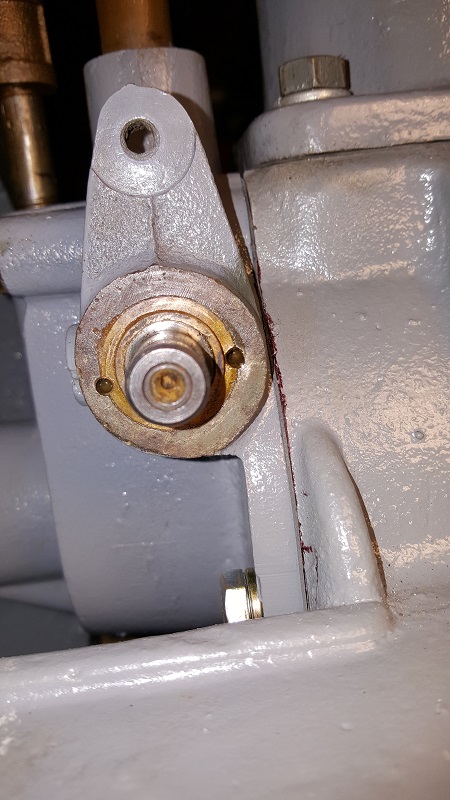
Question on water pump packing, what best to use? heres a picture looking into the water pump where the plunger operates
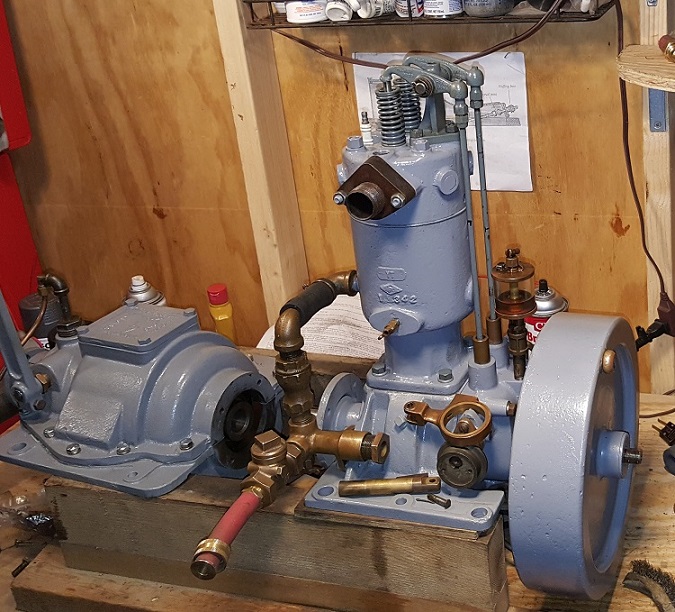
and overall she is coming along (on the messy bench)
 |
david_doyle
Senior Member
Username: david_doyle
Post Number: 101
Registered: 03-2013
| | Posted on Friday, November 04, 2016 - 12:16 pm: |
|
Nice work Kayak, Looks brilliant.
You must be so pleased with the whole operation. |
kayak
Senior Member
Username: kayak
Post Number: 52
Registered: 06-2016
| | Posted on Friday, November 04, 2016 - 03:17 pm: |
|
thanks dave, this was a learning process and still is. the improvements are cosmetic plus new oil seals, and unclogged a few oil grooves in engine and trans. also, another benefit is now all fasteners have never-seize with only the camshaft inner shaft not able to be removed. hopefully the camshaft bushings wont lose too much oil to the outside. I am now a big fan of the epoxy primer, very tough stuff. I don't think it has scratched through at any place.
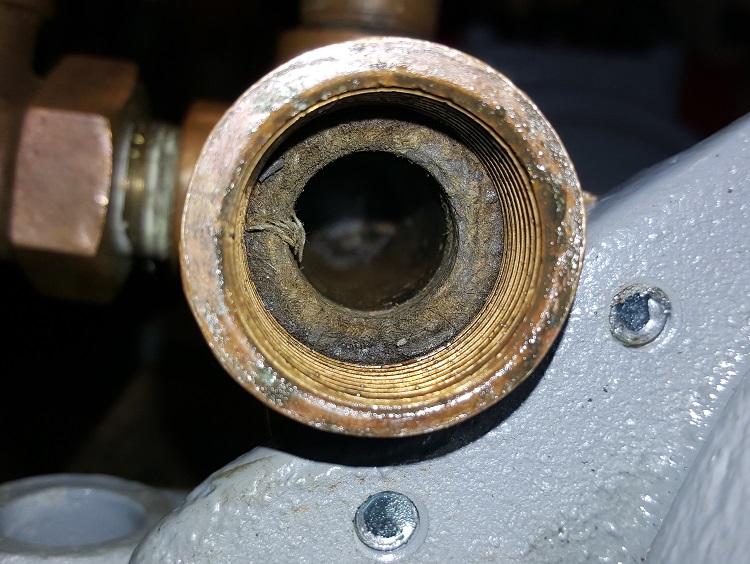
as to the water pump, I still hope someone can suggest the correct packing. the gland nut turns in too far so I think it needs new packing. just not sure what to go with. |
kayak
Senior Member
Username: kayak
Post Number: 53
Registered: 06-2016
| | Posted on Friday, November 04, 2016 - 03:29 pm: |
|
another question as well, the valve guides feel a bit loose (cold), and there are no seals. is this normal? if not, is there an improvement that wont disturb the head?
here is a short clip
https://youtu.be/teS5d35F7r0 |
kayak
Senior Member
Username: kayak
Post Number: 54
Registered: 06-2016
| | Posted on Friday, November 04, 2016 - 03:40 pm: |
|
and, a fun one - what it may look like if/when I get it running! ha!
https://youtu.be/zXSxEZ11CGU |
ernie
Senior Member
Username: ernie
Post Number: 2330
Registered: 01-2002
| | Posted on Friday, November 04, 2016 - 04:06 pm: |
|
Use Teflon packing in the pump.
Search for Teflon valve packing on the net.
Leave it so it drips a little but when it is running
I use the little stuff you get at the hardware store and just keep winding it in till I have enough.
The bigger sizes cost a fortune. I think I used 3 packages of the little stuff in a Palmer Q1 at 1.99 a package.
There is a bunch on eBAG (not a spelling error) |
raa
Senior Member
Username: raa
Post Number: 138
Registered: 02-2007
| | Posted on Friday, November 04, 2016 - 11:36 pm: |
|
I have not had great luck with Teflon it cold flows past the nut sometime. I have had great luck with 1/8" square woven packing which is impregnated with bees wax. That is what it looks like in your packing nut. |
kayak
Senior Member
Username: kayak
Post Number: 56
Registered: 06-2016
| | Posted on Saturday, November 05, 2016 - 12:59 am: |
|
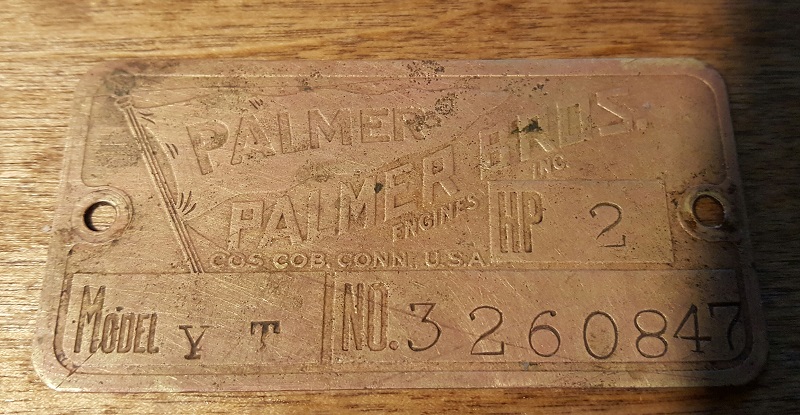
I have some flax shaft packing, 3/16" is it worth a try?
Also, any advice on this engine tag. It seems that Palmer had the lower elevations painted black but I dont know how to recreate that. Maybe just polish it up the way it is? I searched and saw another thread where these were recreated but this one is not that bad to need that.
Any advice on the valve guide clearance topic (above) also would be appreciated.
thanks as always
 |
ernie
Senior Member
Username: ernie
Post Number: 2331
Registered: 01-2002
| | Posted on Saturday, November 05, 2016 - 08:23 am: |
|
USE TEFLON |
raa
Senior Member
Username: raa
Post Number: 139
Registered: 02-2007
| | Posted on Saturday, November 05, 2016 - 10:15 am: |
|
If Ernie says to use Teflon better pay attention and use it . I may have had a one off bad experience . |
david_doyle
Senior Member
Username: david_doyle
Post Number: 102
Registered: 03-2013
| | Posted on Saturday, November 05, 2016 - 11:22 am: |
|
Tag: no Polish!
Wish I had the answer to the valve rod question. Maybe do some research on different engine models to get an idea of what is acceptable. Are those guides replaceable? On the positive side if they do need to be tighter it is a very doable repair, that can be accomplished just as easy after the engine is mounted and connected to a device. Hate to say it but a new guide held in a lathe and run thru with a reamer or d-bit could be as tight or as loose as you decided it needed to be.
If you have a small hole gauge it might be revealing to measure inside that guide and see if it is a consistent bore or if you can measure wear or detect an oval.
Hope you get it sorted so you can happily move on to the device. |
ernie
Senior Member
Username: ernie
Post Number: 2332
Registered: 01-2002
| | Posted on Saturday, November 05, 2016 - 01:57 pm: |
|
Raa yes it will cold flow if your aren't careful. On a show engine it really doesn't matter on the packing but one in a boat that will run at higher speeds for longer times with Teflon it won't wear the pump plunger if you get it a little on the tight side |
kayak
Senior Member
Username: kayak
Post Number: 57
Registered: 06-2016
| | Posted on Saturday, November 05, 2016 - 03:28 pm: |
|
not too worried about the valve guides, and they get lubricated manually when oiling with squirt can before each startup. hopefully someone will mention whats a normal range on that because obviously there would be a limit for example, the intake clearance will act as a vacuum leak and exhaust as an exhaust leak, however small it may be. i am sure its fine for running the way it is, as these are low tension engines. |
johnoxley
Senior Member
Username: johnoxley
Post Number: 169
Registered: 04-2010
| | Posted on Saturday, November 05, 2016 - 05:25 pm: |
|
Valve guides - Simple matter to take head to auto recon shop who can ream out existing guides and fit thin wall bronze sleeves. They can also recut seats and grind valves, which will be a huge improvement. (We also fit hardened seats that allow us to use unleaded fuel - Never use E10 as it attracts moisture.) In current form your valve guides will leak air and exhaust and wear will be accelerated. Suspect idle poor due to air leaks upsetting mixture?
Water pump - Original is best so try for some greasy hemp stern gland packing from a boat chandlery - tighten gently. Gland looks too big for pipe Teflon and you would need full braided rope packing. |
ernie
Senior Member
Username: ernie
Post Number: 2333
Registered: 01-2002
| | Posted on Saturday, November 05, 2016 - 08:46 pm: |
|
If it ain't broken don't fix it.
Kyak's engine ran perfect when I owned it.
As to E10 it has been run on E10 since 1987 or pump gas. I don't remember when E85 showed its ugly head.
As far as oiling the valve stems, rocker arms and push rods what the manual says isn't very clear on how often to oil all the external points which are the 2 snap oilers for the cam bearings, the water pump parts and rockers, valve stems and push rods.
However this being said after a days run the engine will be oily. A few drops each hour should suffice.
Better to have to wipe the engine down than have to repair worn parts.
As per manual valve clearance is .010 in.
The YT manual doesn't give valve stem clearance but all the other Palmer engines show 3 thou for a new spec. I just checked an NOS YT valve in an NOS YT head and it is right at .003 in
The guides are replaceable but are big enough to be reamed and and a thin guide insert pressed in if you want to go that far. |
bruce
Senior Member
Username: bruce
Post Number: 589
Registered: 07-2002
| | Posted on Saturday, November 05, 2016 - 11:12 pm: |
|
Again, A schmere of that silicone stop cock grease on the pump stem before winding the teflon string packing spares the packing and any pump rod wear. |
kayak
Senior Member
Username: kayak
Post Number: 58
Registered: 06-2016
| | Posted on Saturday, November 05, 2016 - 11:14 pm: |
|
all good points. and Ernie is correct that "if it aint broke dont fix it" can sometimes be the best path.
I would not attempt to remove or work on an old marine cylinder head with corrosion inside because it would be easy to damage or even destroy a casting by causing a crack. I'm nervous just reinstalling threaded fittings!
but the valve guide question and video was really about learning what is to be expected with these engine and what is acceptable. I understand there could be a range of opinions. the idea is to know, and choose the best path considering all aspects such as age, possible corrosion stress points, etc. the valve issue was more a question and is not to me, a priority at all. it really is fine as long as the engine doesnt suck so much air that it wont idle, and it doesnt. |
kayak
Senior Member
Username: kayak
Post Number: 60
Registered: 06-2016
| | Posted on Friday, November 11, 2016 - 08:08 am: |
|
OK got to disassemble and clean up the Cuno Timer. It's in good shape except the inner ring which the roller rides against, which has a crack. It's use-able the way it is but if it were to crack all the way through, i were to turn a new one on a lathe, what material to use? (Couldn't find on a search). Delren perhaps?
What is the original fibrous material it is made of?
Also the brass screws holding the sawtooth timer bracket to the cam housing were ground flat somehow with barely any slot. I managed to get them off and plan to replace them. Are these screws normally very flat headed or was this something like the timer shaft wore them down due to being installed too far?
Finally, Does the timer shaft align so the wheel makes contact at TDC or in the wheel in the center of the contact at engine TDC (TDC matching on both)? Can't find this either.
I did find and print out a nice Cuno article by Richard day online while searching for info!
http://www.gasenginemagazine.com/equipment/cuno-timer
Thanks
 |
jb_castagnos
Senior Member
Username: jb_castagnos
Post Number: 1248
Registered: 07-2002
| | Posted on Friday, November 11, 2016 - 08:12 pm: |
|
I use garolite from McMaster Carr. |
ernie
Senior Member
Username: ernie
Post Number: 2336
Registered: 01-2002
| | Posted on Friday, November 11, 2016 - 09:04 pm: |
|
I have new ones made from delran plastic
Give me a holler
The screws have to be flat for the timer shaft to fit right. If the screw heads are too tall the timer shaft will not seat deep enough and the roster comb won't mesh properly. I most likely have some of the right screws too. |
kayak
Senior Member
Username: kayak
Post Number: 61
Registered: 06-2016
| | Posted on Friday, November 11, 2016 - 09:47 pm: |
|
ok ernie thanks a million. as u know I am slow but will get with u on that, also what I have is not cracked thru so its serviceable for now.
jb I looked up your suggestion on garolite, its interesting rugged stuff, and the right color too! a little harder to machine they say. |